
As a grad student, I was a TA for the introductory biology labs at LSU. The second semester lab had some modules on evolution, including a population simulator. This simulator was developed about 20 years ago, and was difficult to install, as well as having a layout that was unfamiliar to the students. When I was getting ready to graduate from my PhD, the department approached me about making a new simulator. I was a few Shiny apps deep at that point, and was excited about making something that would actually get used!
Setting up a simulation
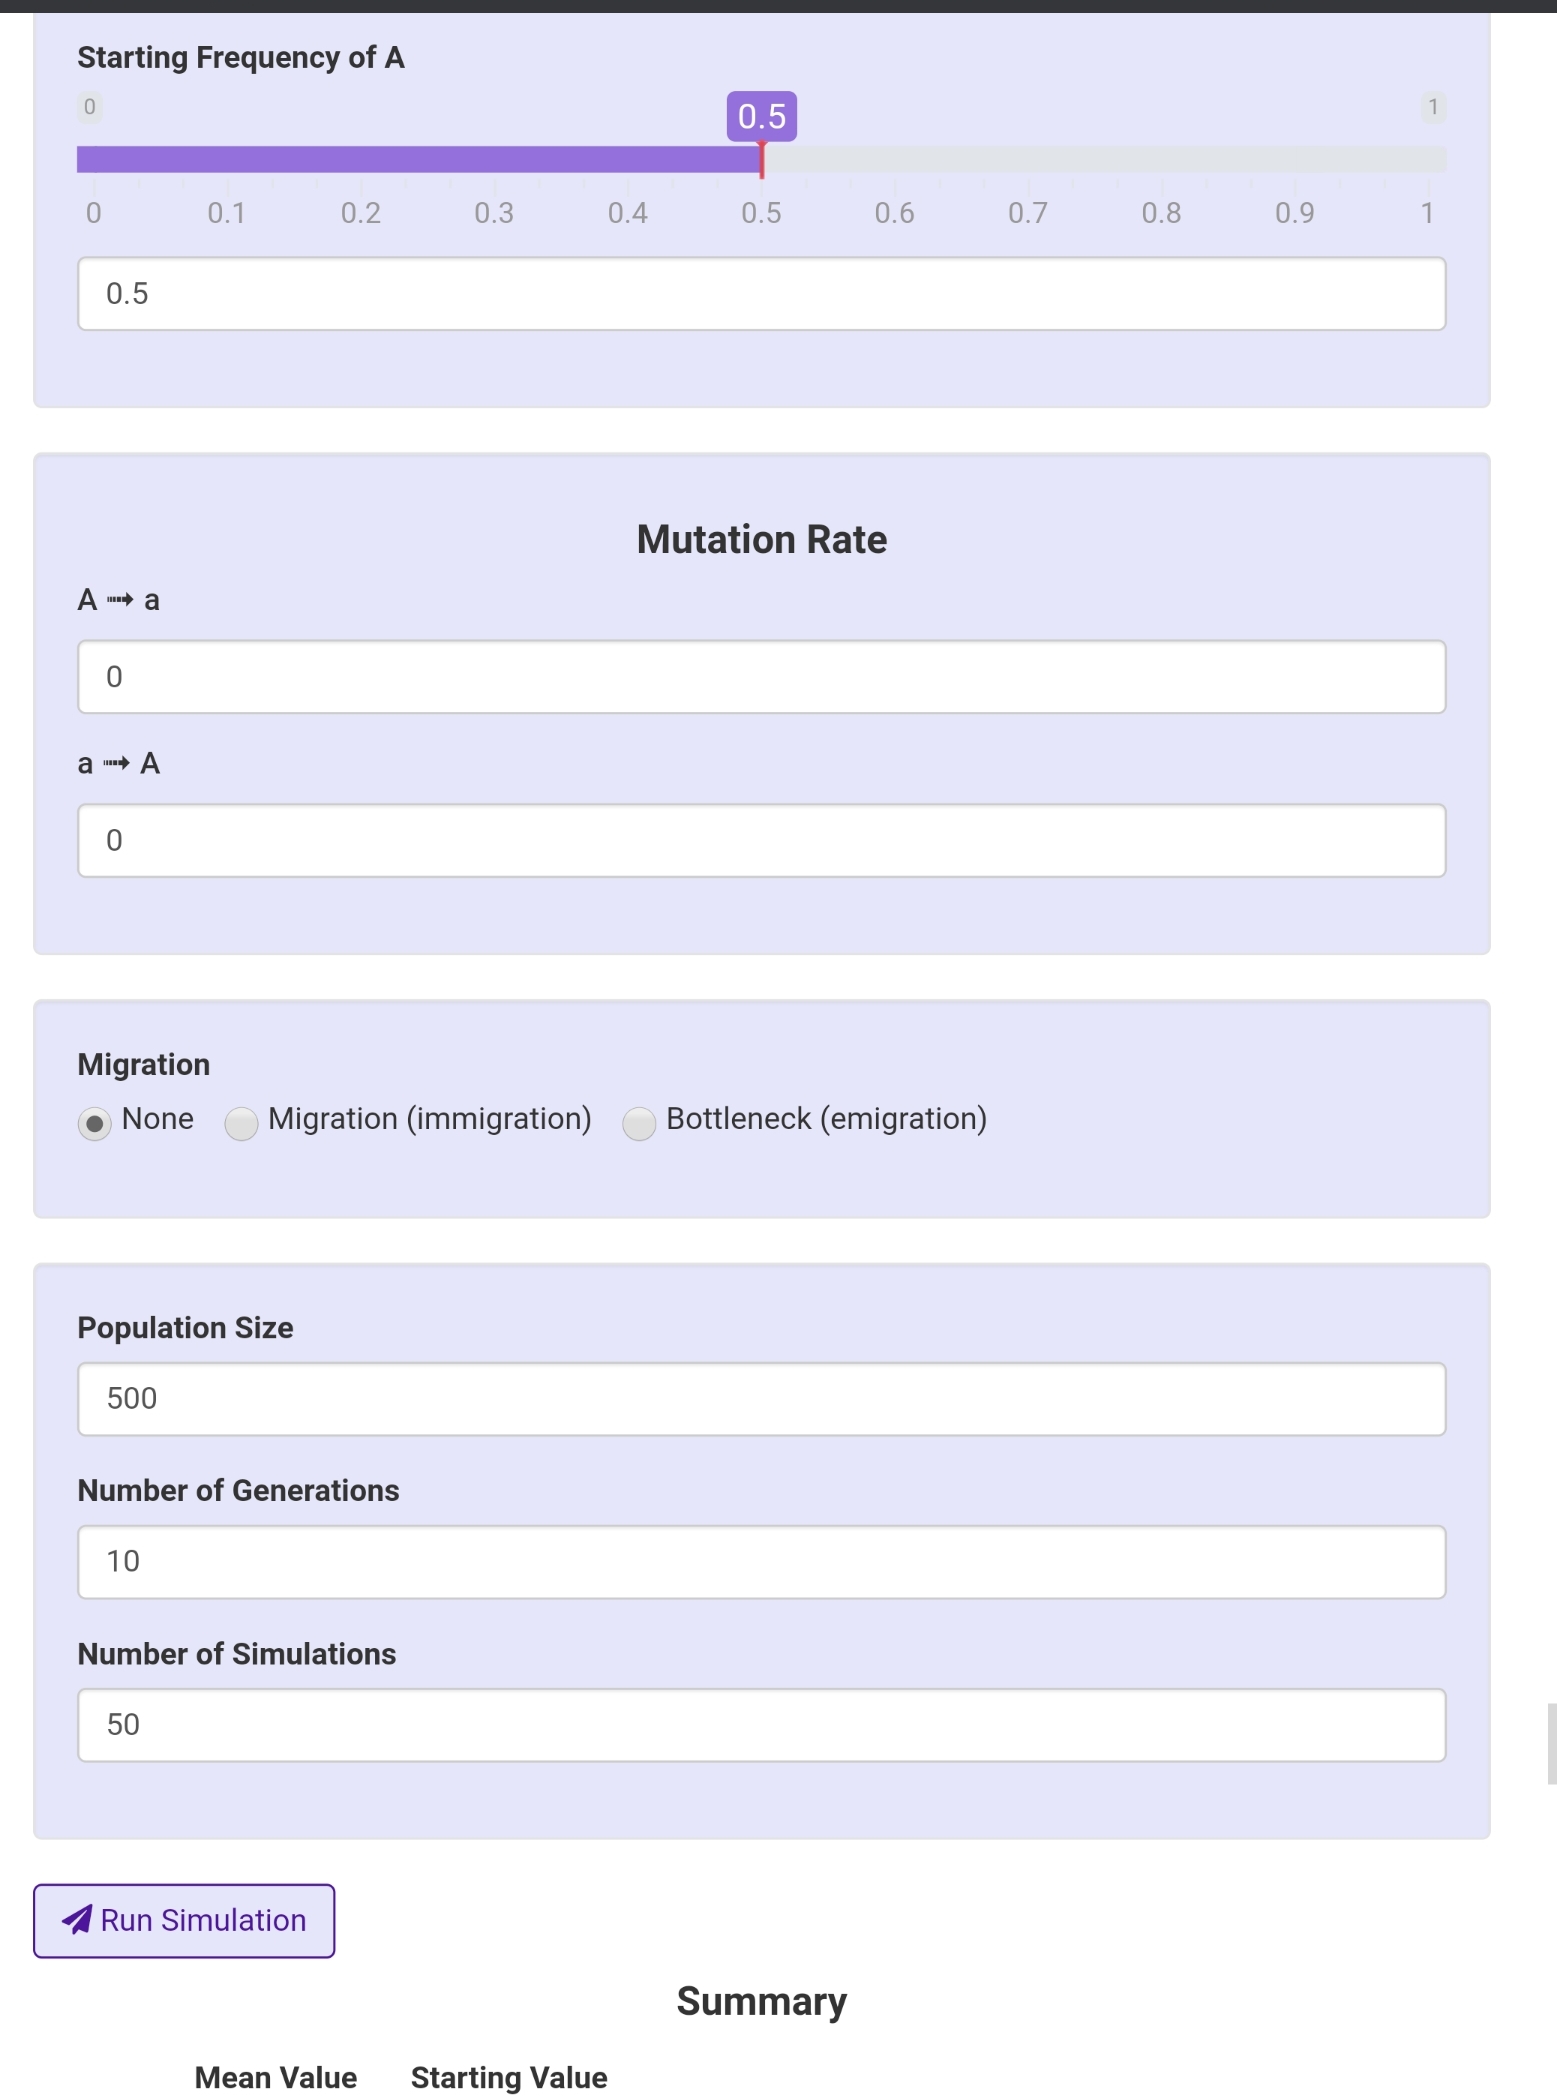
The simulator has two alleles, dominant A and recessive a. To set up a simulation, enter the fitness of the three genotypes, starting frequency of A, mutation rates, population size, number of generations, and number of simulations. The simulations are stochastic, and follow the Hardy-Weinberg equilibrium:


Simulation outputs
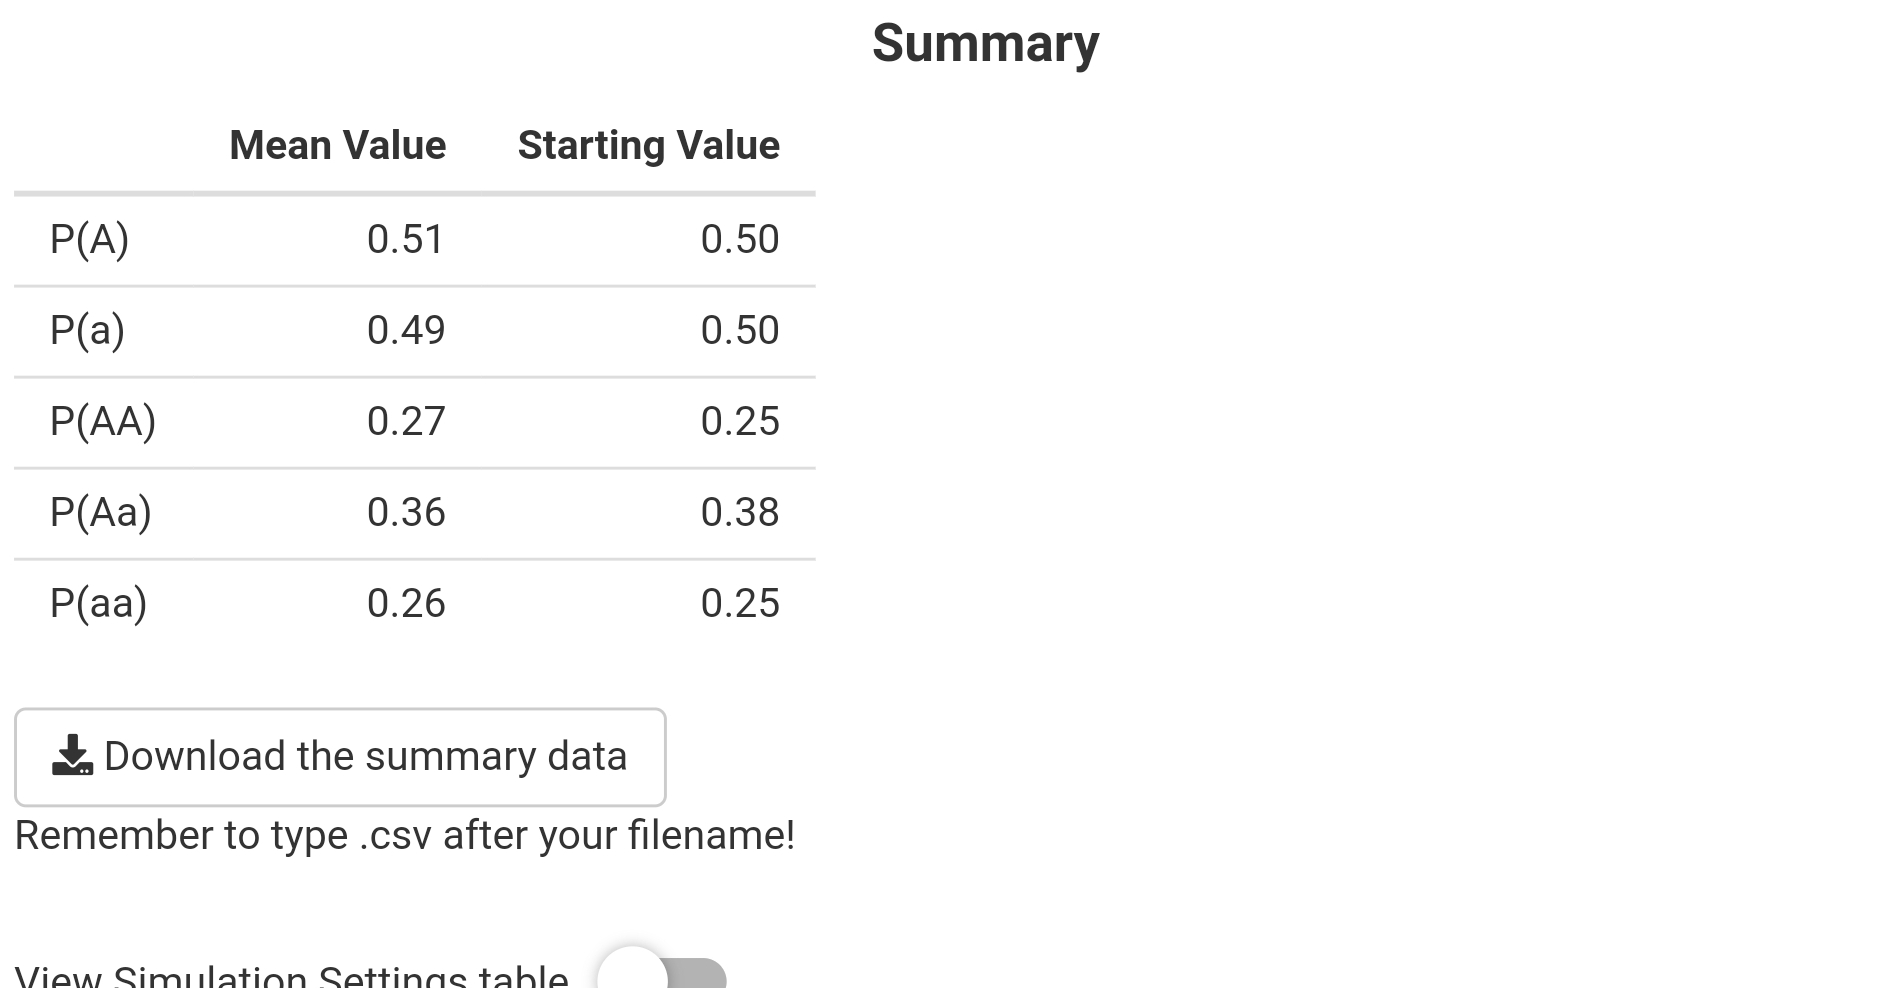
After running the simulation, a few outputs are available. The summary table provides some information on the starting proportions and average ending proportion across all populations. A simulation settings table is also available, to keep track of what settings produced what results. The plot shows the trajectory of the populations over the generations.


Finally, you can view the histograms of the genotypes and the alleles across the populations at the last generation.
Migration or bottleneck event
Migration and bottleneck events can be simulated as well. The generation, size, and frequency of A can be set. The event will be applied to all populations in the simulation, and the frequency of AA, Aa, and aa genotypes will be determined using the Hardy-Weinberg equation.

Using the tutorial
I suggest going through the tutorial the first time you use the app. The tutorial can be started by selecting the toggle. The tutorial goes through each function of the app, and you can skip around if you need to. The tutorial explains the biology (and sometimes math) behind each function, as seen below.

Technical challenges
I wanted to add a handful of thoughts about the technical side of developing this app. One challenge was making the inputs screen-reader friendly. The sliders I used are not able to be screen-read. I could have simply used a text input, but I wanted the visual reminder of this being a proportion. In the end, I implemented both, and wrote some code that syncs the slider and the free-input to show the same value.
Another challenge was implementing a tutorial. I could have written up something separately (like I did here), but thought that might be a little frustrating for a student who is trying to complete an assignment – it adds some clicks and scrolls. Since R Shiny is a single webpage, I implemented some conditional statements that show and hide the different portions of the tutorial. This way, the tutorial is interactive, since the selections you make are made to the base app – the layout is just simplified. Hopefully, that will result in a better experience.
R Shiny simplifies implementation of a lot of the functionality required for an app like this. And of course, it can be hosted anywhere, or downloaded and run locally. I’ll be talking more about R Shiny, and making apps, in the next few weeks, since a related paper is being submitted soon!
